Setting Up the SonarCode Scanner.
SonarQube’s code scanner is a package that you can install on different machine, it’s not good idea to install it with sonarqube server, You can install it on testing setver or in your local machine. There are packages available for Windows, MacOS, and Linux which you can find at the SonarQube web site. In the previous article we have setup Sonarqube server on kubernetes. Click here to read the post.
- Create a directory for sonar scanner
mkdir /opt/sonarscanner
cd /opt/sonarscanner
Download the SonarQube scanner for Linux using wget. you can download as per your OS.
wget https://binaries.sonarsource.com/Distribution/sonar-scanner-cli/sonar-scanner-cli-3.2.0.1227-linux.zip
Unzip, Extract the scanner.
unzip sonar-scanner-cli-3.2.0.1227-linux.zip
After that, we have to modify a few settings to get the scanner working with our server install. Edit the configuration file and un-comment the line starting with sonar.host.url and add yours.
vim sonar-scanner-3.2.0.1227-linux/conf/sonar-scanner.properties
#Configure here general information about the environment, such as SonarQube server connection details for example
#No information about specific project should appear here

#----- Default SonarQube server
#add your sonarqube server ip.
sonar.host.url=https://mysonarqube.com

#----- Default source code encoding
#sonar.sourceEncoding=UTF-8
Make the binary executable.
chmod +x sonar-scanner-3.2.0.1227-linux/bin/sonar-scanner
Create the symbolic link so that you don’t need to specify full path.
ln -s /opt/sonarscanner/sonar-scanner-3.2.0.1227-linux/bin/sonar-scanner /usr/local/bin/sonar-scanner
Now the scanner is up and running, Now run your fisrt code scan.
Run code scan for your project.
Go to your project directory and create a file name “sonar-project.properties”, Define the project name, Project key, project version and the current directory.
sonar.projectKey=my-project
sonar.projectName=my-project
sonar.projectVersion=1.0

sonar.sources=.
Now you can run the code scan from your machine. To run code scan you will need token of the sonarqube server. So create sonarsqube user token first.
Go to My account > Security and generate the token.
Run the code scan now.
sonar-scanner -D sonar.login=your_token_here
Once the scan is complete, you’ll see a summary screen similar to this:
INFO: Task total time: 7.933 s
INFO: ------------------------------------------------------------------------
INFO: EXECUTION SUCCESS
INFO: ------------------------------------------------------------------------
INFO: Total time: 19.249s
INFO: Final Memory: 19M/296M
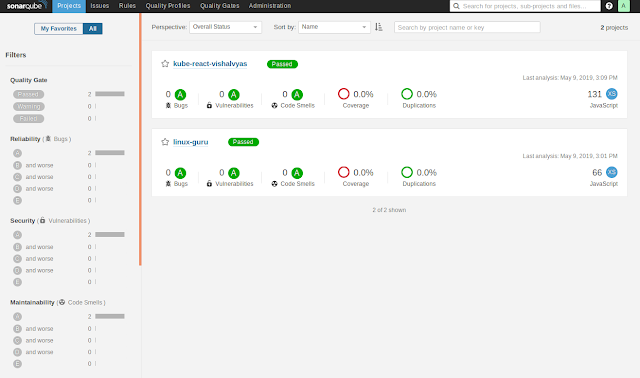
And the project’s code quality report will now be on the SonarQube dashboard. You can check it on your sonarqube server.
Gitlab CI/CD integration with SonarQube.
As with sonnar-scanner, you will need to have a sonar.properties file in your project’s root folder. To run the scan, add the following to your gitlab-ci.yml
For preview mode :preview_mode:
image: emeraldsquad/sonar-scanner
stage: analysis
artifacts:
script: sonar-scanner -Dsonar.host.url=$SONAR_URL -Dsonar.login=$SONAR_TOKEN -Dsonar.analysis.mode=preview -Dsonar.gitlab.commit_sha=$CI_COMMIT_SHA -Dsonar.gitlab.ref_name=$CI_COMMIT_REF_NAME -Dsonar.gitlab.project_id=$CI_PROJECT_ID -Dsonar.gitlab.unique_issue_per_inline=true
only:
- master
For analysis mode :analysis_mode:
image: emeraldsquad/sonar-scanner
stage: analysis
artifacts:
script: sonar-scanner -Dsonar.host.url=$SONAR_URL -Dsonar.login=$SONAR_TOKEN -Dsonar.gitlab.commit_sha=$CI_COMMIT_SHA -Dsonar.gitlab.ref_name=$CI_COMMIT_REF_NAME -Dsonar.gitlab.project_id=$CI_PROJECT_ID -Dsonar.gitlab.unique_issue_per_inline=true
only:
- master
Variables :
SONAR_URL=URL
SONAR_TOKEN=YOURTOKENLinuxguru
