
Samba is an effective tool for sharing files and printers across networks, particularly in mixed environments with Windows and Linux systems. In this guide, I will explain to you How to install and configure samba in Ubuntu so you can share folders across your network. I have also shared in a previous article about how to block certain file extensions on samba.
Install Samba
Before we start, make sure that Samba is installed on your Ubuntu system. If not already installed, you can install it by running the following commands in your terminal:
sudo apt update
sudo apt install samba
Create a Shared Directory
First, make a directory that you intend to share. For example, let us create a directory called “samba”:
sudo mkdir /home/vishal/sambaEdit Samba Configuration
Open the Samba configuration file for editing sudo vim /etc/samba/smb.conf and Scroll to the end of the `smb.conf` file and add the following configuration for your share
[vishal]
   comment = Shared Folder
   path = /home/vishal/samba
   browsable = yes
   read only = no
   valid users = @vishal
Adjust the “path” and other options as needed for your setup. Save and Close ( Escape :wq and Enter) to exit the editor.
Here are some options for customizing the share block in Samba configuration to meet your needs. These options give you more control and customization over your Samba shares, allowing you to define specific behaviors, access restrictions, and visibility rules based on your needs and security policies. Adjust these options to tailor the shared folder’s behavior to your environment.
Path: Indicates the path to the directory you want to share.
path = /path/to/shared/folderGuest OK: Allows guests to access the shared folder without requiring a username and password.
guest ok = yesPublic: Similar to guest ok, this allows public access without authentication.
public = yesValid Users: Determines which users are permitted to access the shared folder. These users will be the only ones with access.
valid users = user1, user2Read Only: Specifies whether the shared folder is read-only or allows write access.
read only = noWritable: Like read-only, this specifies whether the folder can be written to. It provides an alternative to reading only.
writable = yesBrowseable: Shows whether the shared folder is visible when browsing the network.
browseable = yesCreate Mask: This specifies the default permissions for newly created files.
create mask = 0644Directory Mask: Sets the default permissions for newly created directories.
directory mask = 0755Force User: Assigns all file and directory ownership to the specified user.
force user = usernameForce Group: Assigns group ownership of all files and directories to the specified group.
force group = groupnameAvailable: Indicates whether the share is currently available. If set to no, the share will not be accessible.
available = yesVeto Files: Disallows certain files or directories from being visible or accessible in the share.
veto files = /*.exe/Create a Samba User
Make a Samba user and set a password for accessing the shared folder. Replace ‘username’ with the desired username:
sudo smbpasswd -a usernameTo set the password for the Samba user, follow the prompts.
Restart Samba Service
After modifying the configuration, restart the Samba service to apply the new settings:
sudo systemctl restart smbdAccessing Shared Folder
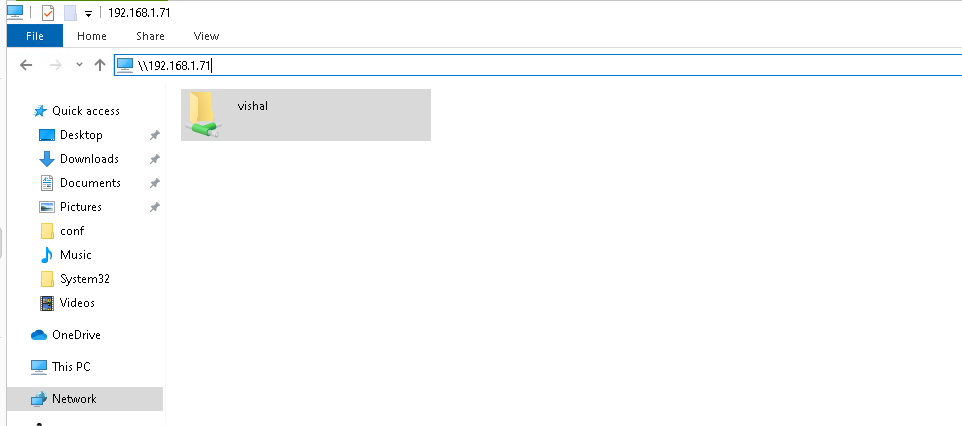
From Windows:
Open File Explorer and enter \\<Ubuntu_IP_Address> in the address bar. You should see the `shared_folder`. Enter the Samba username and password when prompted.
From Linux:
Open your file manager and enter smb://<Ubuntu_IP_Address> in the address bar. Enter the Samba username and password to access the shared folder.
Following these steps, you have successfully set up a Samba server on Ubuntu to share folders across your network. Customize the configurations to meet your specific needs and security policies.